This is the result of session 8 in my course on Social Robot Design (2025/2026). The content of this session was mainly about putting everything of the game together. We thought of the cards, how they would look etc. How we can make our booklet and poster. And also the video. Over the next few weeks we actually printed and made everything.
Session 8
Planning the deliverables
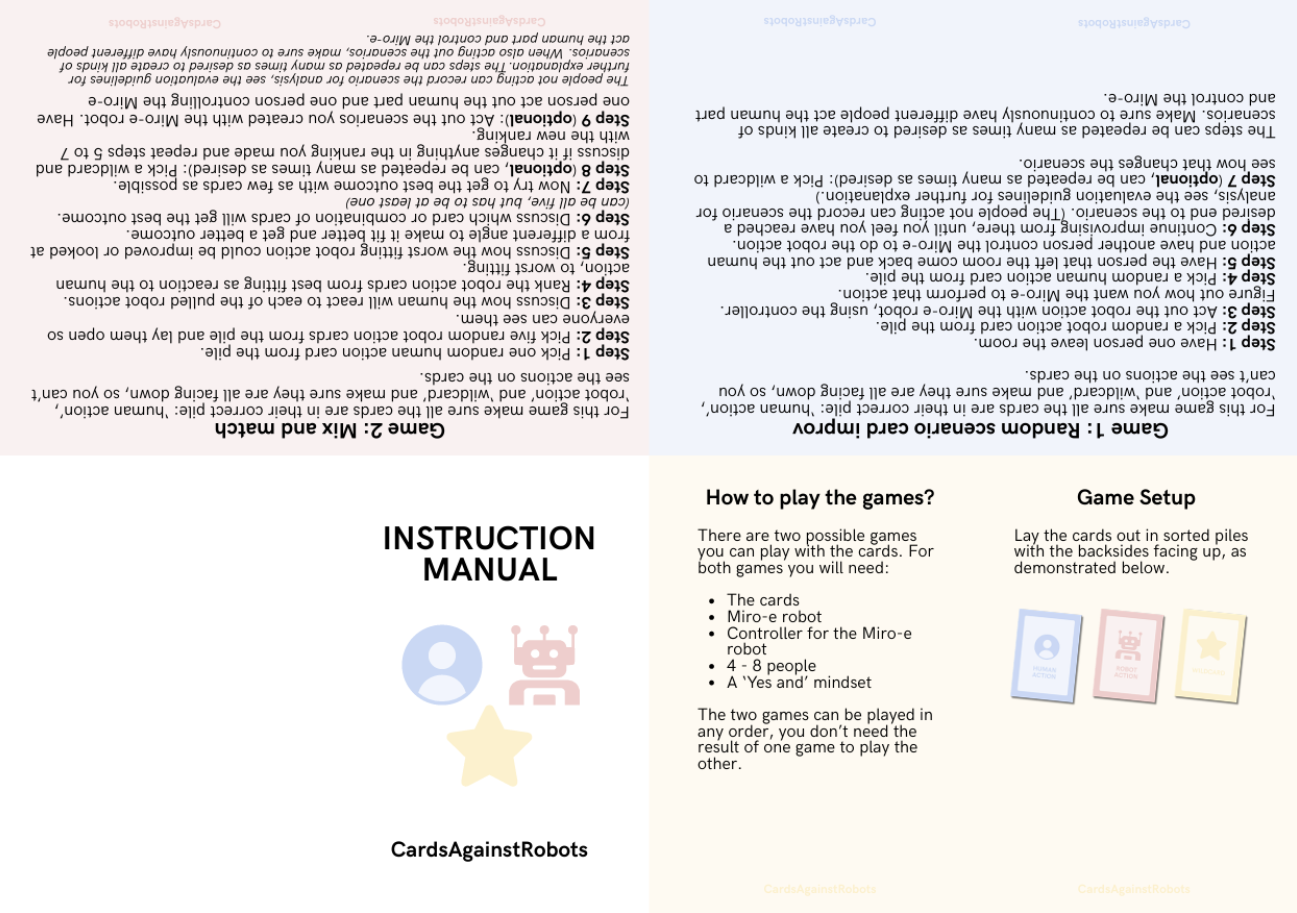
Before session 8, we had already puppeteered Miro and written step-by-step guidelines for puppetering. This session was about turning that work into three deliverables: a booklet, a poster, and a video.
Booklet
The booklet needed to bring together you would need to play the game. It had to contain:
- Game guidelines
- Evaluation guidelines
- An evaluation form (with a QR code linking to more copies)
- section on how to use the evaluation results
- All of the above combined into one document
The booklet is meant to fold:
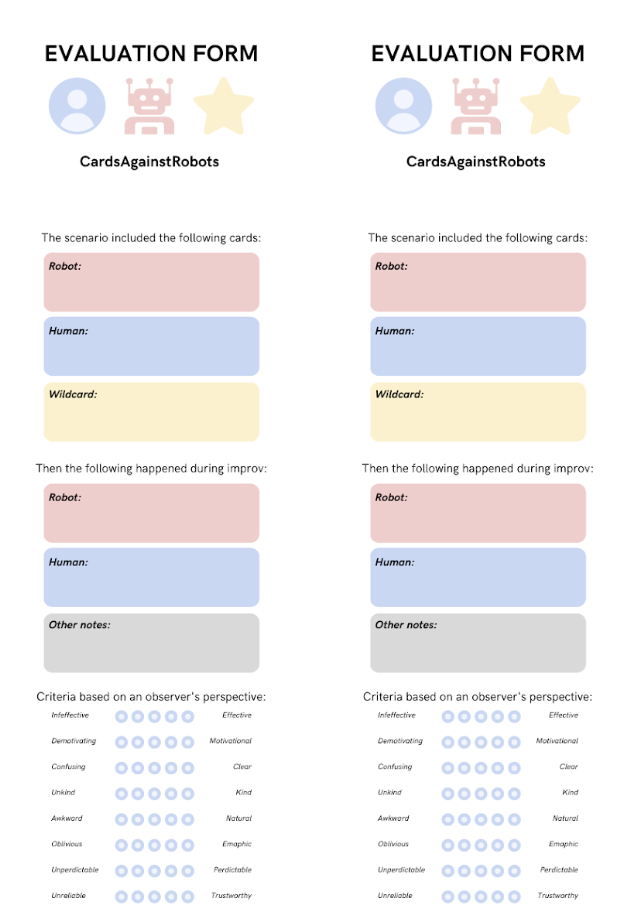
Evaluation form
Alongside the game itself, we designed an evaluation form to capture feedback on the robot design choices made during a session. The form was kept short and structured, so it could be filled in quickly right after playing.
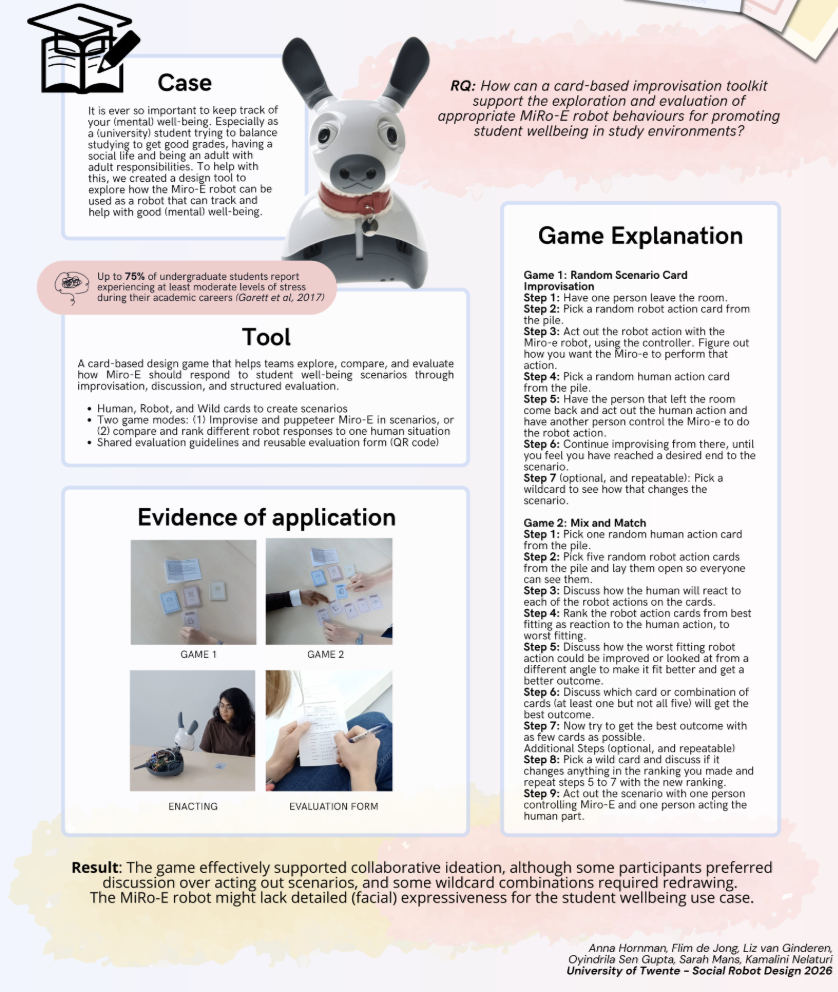
Poster
For the poster we brought together the case, our research question, the tool itself, and how the game works. We added photos of the cards, the puppeteering, and someone filling in the evaluation form to show it in actual use. We ended with a short result: the game worked well for getting people to think together, though some liked discussing more than acting things out, a few wildcard combos needed a redraw, and MiRo-E’s lack of facial expressiveness turned out to be a limitation for the wellbeing use case.
Video
The video is divided into a 4-part structure, with each content point capped at roughly 75 seconds:
- The challenge — keeping track of mental wellbeing while studying. We introduce Miro-E, designed to support student wellbeing.
- Tool demonstration. Failures and how we solved them.
The wildcard sometimes didn’t clearly change anything, or produced a totally unrelated outcome. We resolved this by treating a “no effect” result as valid information in itself, or simply drawing another card. We could only include a limited number of physical evaluation forms in the booklet, so we added a QR code. Puppeteering the Miro-E robot worked well for quick improvisation, but was not suited to evaluating final design choices because it wasn’t so easy to puppeteer (technically wise because you had to hook up a computer)
- Evaluation — did the robot design actually improve, and did the tool itself work as intended?
The video itself is handed in as a delivarable and is shown here:
Individual reflection
Contribution: For the movie, I helped write the script, mainly working out how to fit the challenge, tool demonstration, failures, and evaluation into the 75-second-per-part limit. During filming, I puppeteered Miro-E for the demonstration footage, controlling it through the laptop connection while the rest of the group acted out the human side of the scenarios. I also did part of the editing, cutting the raw footage down to match the script and timing it to stay within the 5-minute limit.
What I would change: If I were doing this again, I would puppeteer differently, or atleast make the setup easier. Currentlty we had to take apart the Miro robot and use a ethernet cable. A few of our first takes ran too long and had to be reshot or trimmed heavily in editing, which cost time later.
This was done with:
- Liz van Ginderen (s27349745)
- Anna Hornman (s3056600)
- Oyindrila Sen Gupta (s3697762)
- Sarah Mans (s2306379)