This is the result of session 1 in my course on Social Robot Design (2025/2026).
This is done with:
- Liz van Ginderen (s27349745)
- Anna Hornman (s3056600)
- Oyindrila Sen Gupta (s3697762)
- Sarah Mans (s2306379)
2. Invent a case: How can I check your well-being?
We had to invent a case related to how some robot can check your well-being.
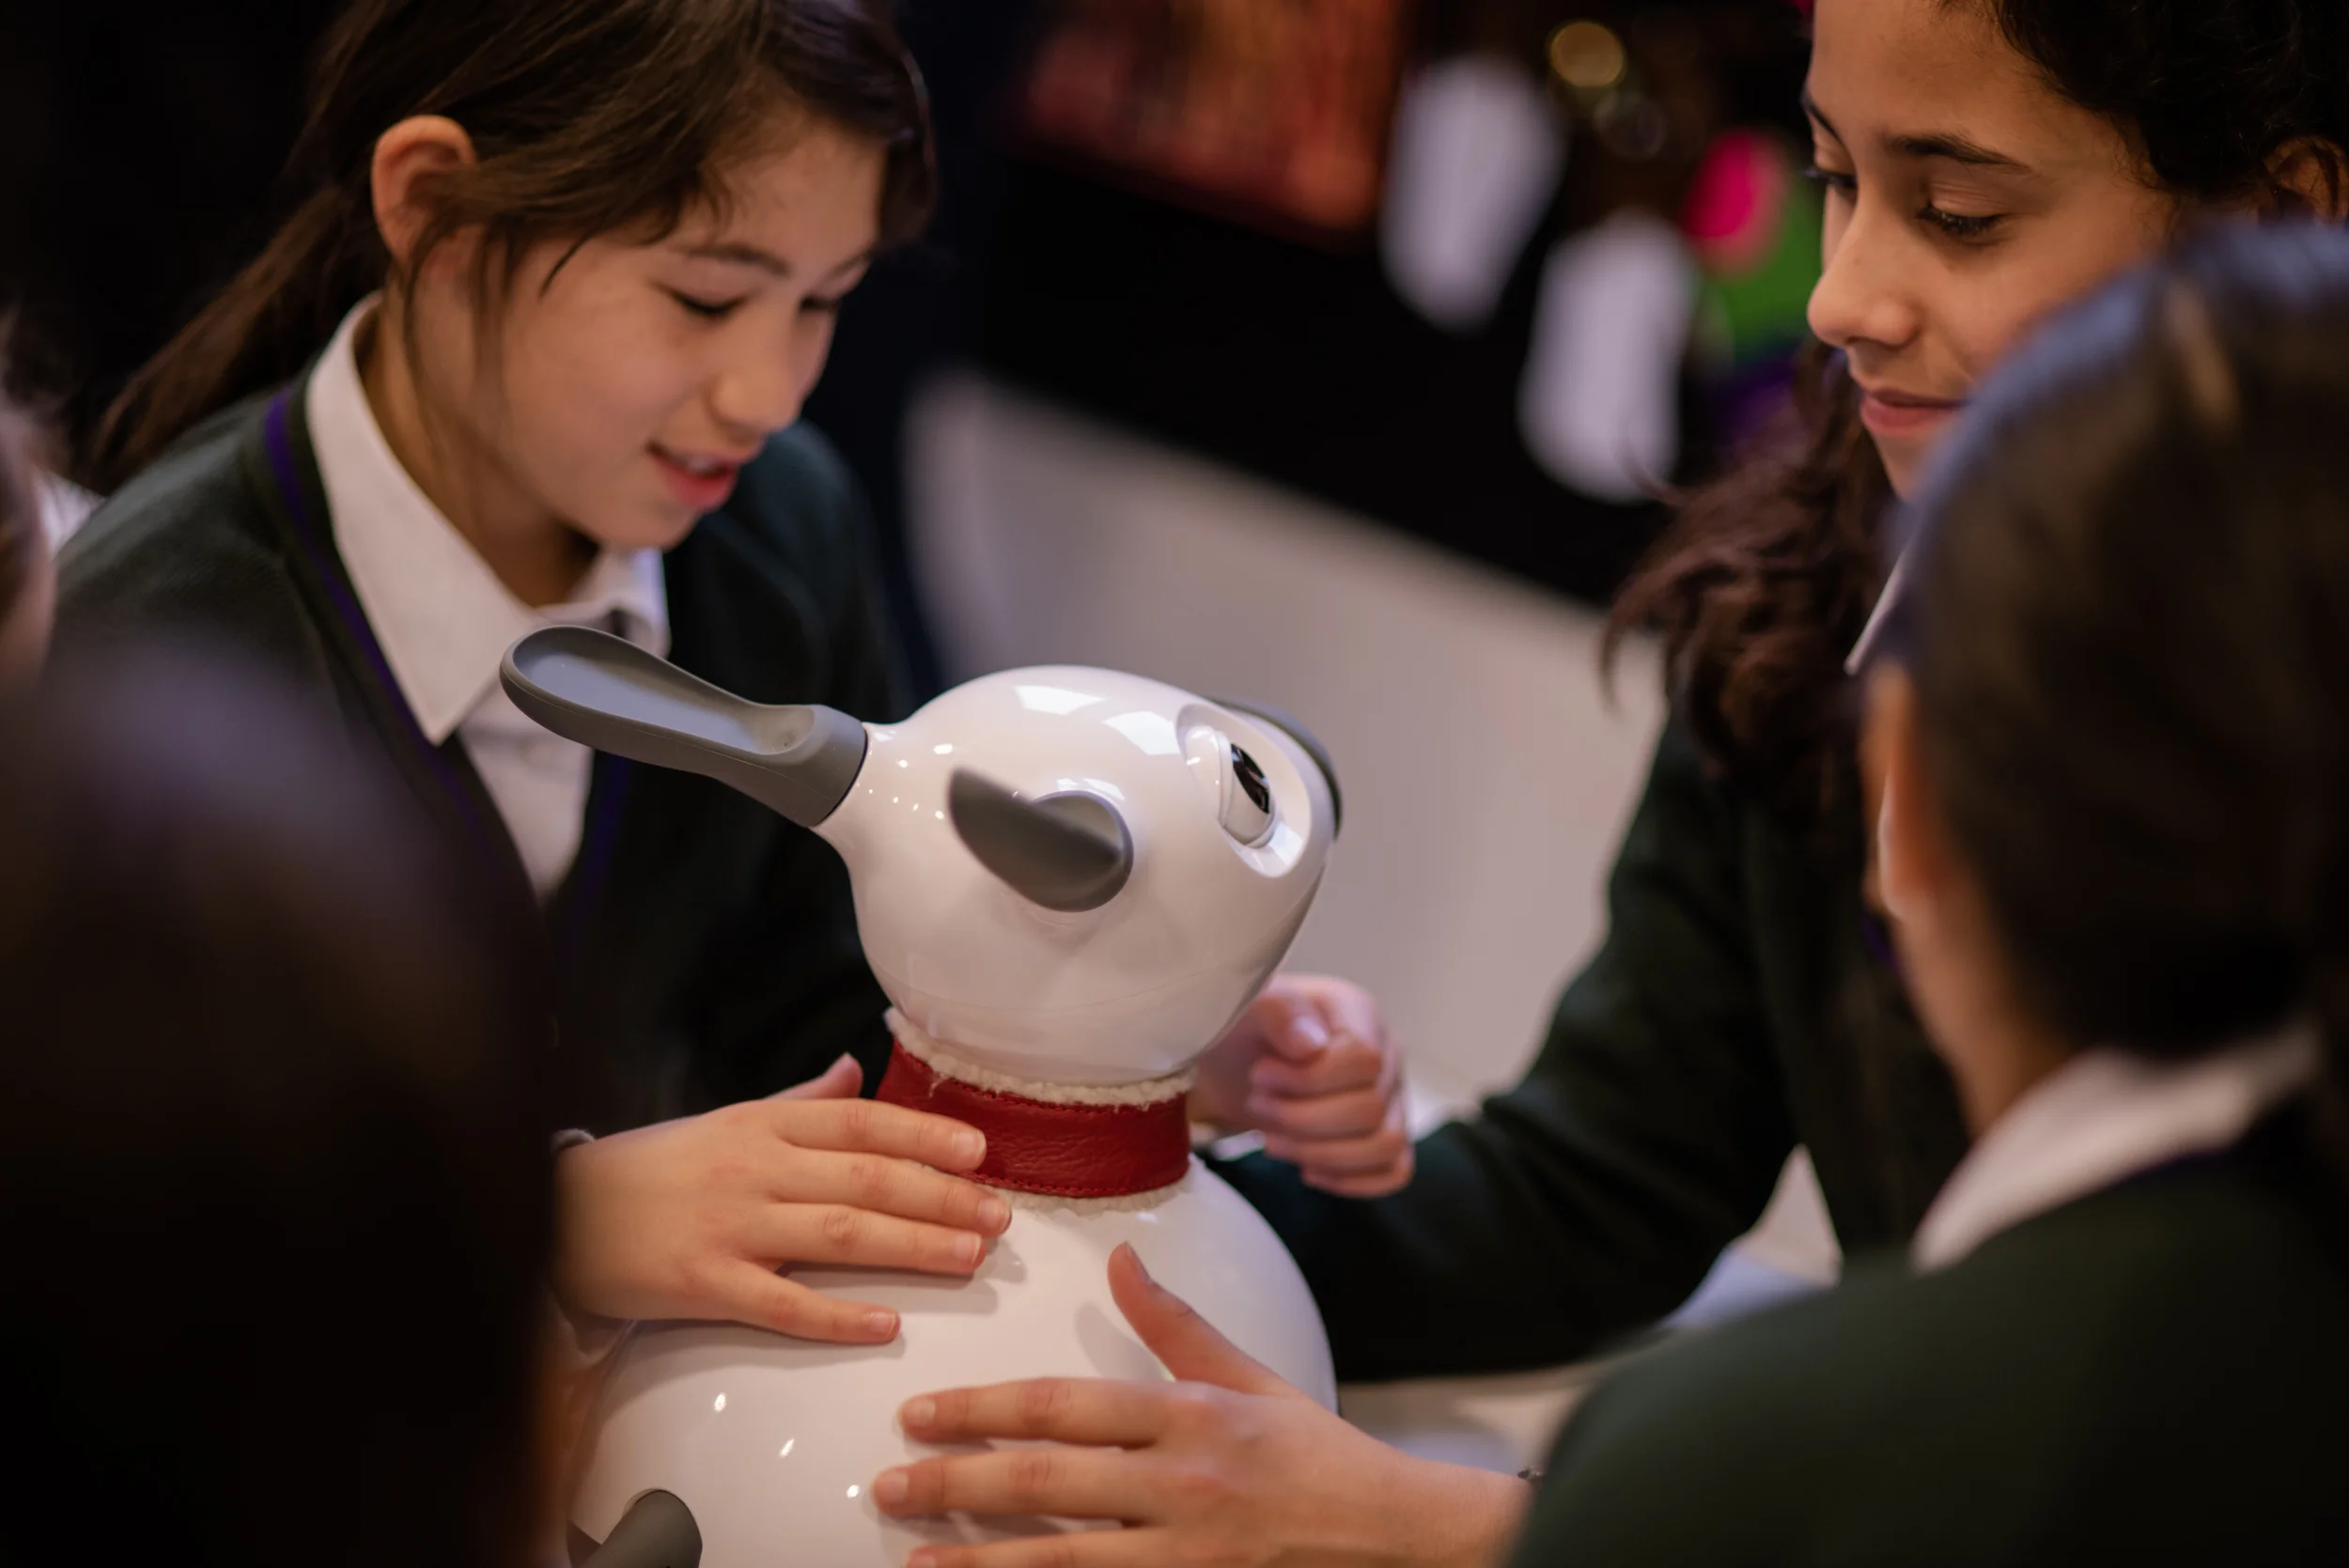 Figure 2: Students interacting with the MiRo robot, showing where the scenario would be used.
Target group
Three target groups were considered: students (ages 18–24), children (ages 5–12), and elderly users. Students were chosen as the focus group, since this group is comparatively underrepresented within well-being research.
- Students (ages 18–24) ← Chosen focus
- Children (ages 5–12)
- Elderly
Well-being types
Within student well-being, several angles were considered: overall well-being, emotional regulation and mood tracking, physical activity, and social connection.
- Overall well-being
- List of questions (see next page)
- Emotional regulation / mood tracking
- Physical activity / gamified exercise
- Social connection / combating loneliness
Cases
From these angles, three possible scenarios were generated: suggesting a call to a friend or family member (targeting isolation and mindfulness), a guided breathing exercise (targeting sleep and mental well-being), and a study-session check-in, where the robot checks in on a student before, during, or after a study session. The study-session check-in was chosen as the final case, as it was felt to be the most fitting.
- Suggest calling a friend or family member — Mindfulness
- Breathing exercise — Sleep hygiene / bedtime routines, mental overload / overworking
- Study session check-in — Do you need a break?
Research questions
We also thought of a few research questions.
- How can the Miro robot….
- How can the Miro robot be expanded upon to help students (ages 18–24) with their overall well-being?
- How can the Miro robot transform to guide students (ages 18–24) through a study session?
3. Get familiar with design methods
The cards we picked were Scenario analysis, Storyboard and Experience map.
The assignment was: Argue how they could be of value for the given challenge: what can you learn by applying method X to our problem Y? Use your imagination, be as concrete as possible, exaggerate!
Chosen cards from the [User Innovation Toolkit]
We chose these 3 scenarios from the user innovation toolkit:
Scenario analysis
- A scenario analysis can be used to imagine future scenarios and reason through them to get a better understanding of our challenge. For example, your target audience is students. You could imagine scenarios where students are sitting down and talking with the Miro robot. The Miro robot would be asking questions, and the students answering. You can put yourself in the shoes of the students, and walk through the scenario itself as if you were there.
- We could also use the scenario analysis to analyse the situation before the Miro robot is implemented to see what problems come up during the original situation.
Storyboard
- A storyboard can be used to visualise how a user uses a product or service. It is a bit similar to the scenario analysis, but now we are really visually looking at what is happening. So you could have images of the Miro robot talking, and students listening. Or it could capture a specific expression of the robot or students.
Experience map
- An experience map can be used to visualize the experience the user goes through while using the product. An experience map can become even more valuable when two are made of the same scenario, one without the product and one with the product. These can then be compared to see what the effect of the product actually is.
- It can also be used during the design stage to visualize what effect we want the product to have on the experience.
4,5,6. Mindmap
We also made a mindmap:
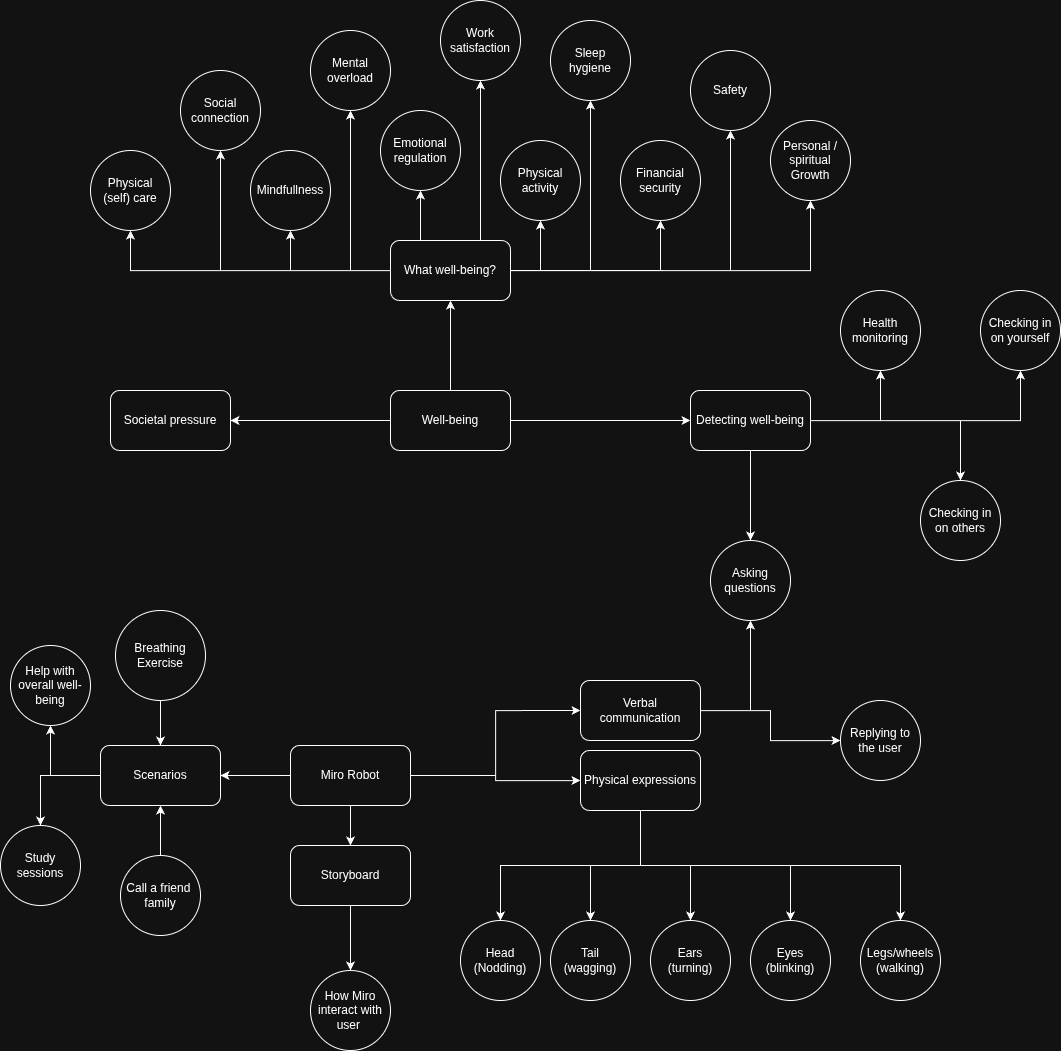 Figure 3: Mindmap exploring target groups, well-being angles, and candidate scenarios, used to narrow down to the study-session check-in case.
7. Functional breakdown
Building blocks
We grounded our design choices in what Miro’s hardware could realistically support for a study-session check-in (so only look at which joints it has), and limit the interaction needed to stay simple enough to prototype quickly.
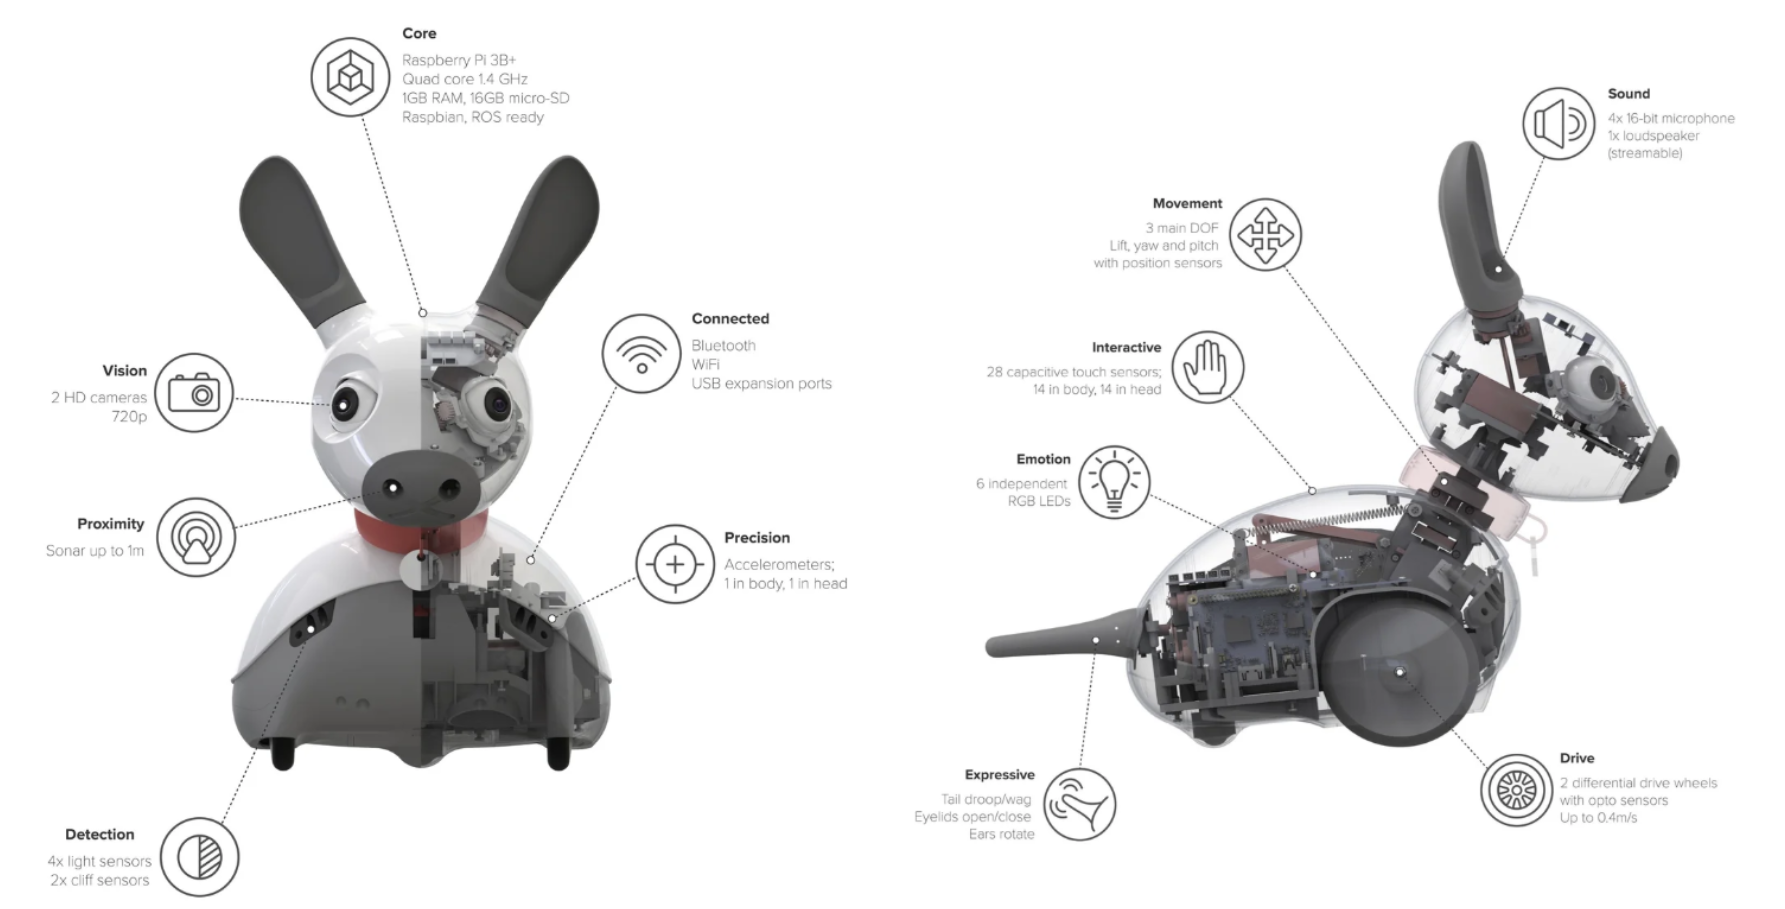 Figure 1: Overview of the hardware design of the MIRO-E Robot.
Hardware
- Utilize Miro’s built-in hardware, such as the actuated eyes and 3 DoF neck — this should give enough creative freedom to express physical expressions effectively.
- Some type of Miro extension kit, which can be used to have Miro do more things or give it tools:
- Add an outer piece to the back for extra speakers for questions, while keeping lights visible
- Add sensors for heart rate / other physiological data to make reactions more specific (requires touch)
- Make the robot dance / dance mode to lift mood
- Add a timer for the breathing exercise
- Add wings
Software
- Use the built-in speaker to enable Miro to talk with students.
- No heavy emphasis on software needed, since verbal and physical communication can be puppeteered by a human.
Outer design
- Create accessories or other components for the Miro (e.g. different ears, collars, clothes, or other add-ons) to make the robot fit into the decided scenario — in this case, university students.
What can be Wizard-of-Ozed
- The talking and possibly limited physical expressions
- In principle, everything could be Wizard-of-Ozed
Experiment
We planned a series of theatre exercises to validate these choices before building anything.
- Theatre exercise to see how students respond to a check-in
- Theatre exercise for different types of check-in
- Theatre exercise with different kinds of questions / themes
- Theatre exercise to see how students answer certain prompts
- Theatre exercise to see how students’ facial expressions change
8. Read up on your platform
Core HRI sources
MiRo-specific literature was used to ground the check-in design.
The multimodal adaptive framework backs up making the check-in adaptive to engagement rather than scripted, using MiRo-E’s eyes/neck for emotional expression. The spoken dialogue paper backs up relying on speech and physical cues for the check-in, supporting why the interaction is possible to be Wizard-of-Ozed. The MiRo social interaction and cognition paper backs up the platform choice itself: MiRo is built to read and express through body language rather than language, matching the “no heavy software” decision to enable fast prototyping. The MiRo edutainment paper backs up positioning MiRo for a student and education-adjacent context. The stress mitigation pilot backs up giving MiRo a role in verbally recommending a concrete next step (such as break, breathing exercise). The stress management study backs up the breathing-exercise scenario, and specifically why perception of the robot (not just the exercise) needs testing via the theatre exercises.
- A Multimodal Adaptive Framework for Social Interaction with the MiRo-E Robot
- Using Multimodal Information to Support Spoken Dialogue Interaction between Humans and Robots
- MiRo: Social Interaction and Cognition in an Animal-like Companion Robot
- MIRO: A Versatile Biomimetic Edutainment Robot
- Human-Robot Interaction for Stress Mitigation: A Pilot Study with Social Robot
- The Effectiveness of Social Robots in Stress Management Interventions for University Students
Adjacent HRI sources
Five publications from outside HRI were used to expand the design space around the study-session check-in case.
The micro-breaks study backs up why the check-in exists at all. Attention drops off after about 25 minutes, so a scheduled break moment helps concentration.
The Pomodoro vs self-regulated breaks study backs up why Miro should be the one to initiate the check-in (as an alternative to pomodoro). Deciding yourself when to take a break adds extra mental load on top of studying.
The breathing practices review backs up the breathing exercise scenario.
The loneliness interventions review backs up the “call a friend” scenario, even though it was not the one chosen in the end. More contact with others reduces loneliness, which is the mechanism behind that idea.
The interruption timing study backs up the timing question, at what point during a study session Miro should approach the student. This is because badly timed interruptions hurt the student more than the interruption itself.
- Sustaining student concentration: the effectiveness of micro-breaks in a classroom setting
- Understanding effort regulation: Comparing ‘Pomodoro’ breaks and self-regulated breaks
- Breathing Practices for Stress and Anxiety Reduction: Conceptual Framework of Implementation Guidelines Based on a Systematic Review of the Published Literature
- Interventions addressing loneliness amongst university students: a systematic review
- When to Interrupt: A Comparative Analysis of Interruption Timings Within Collaborative Communication Tasks